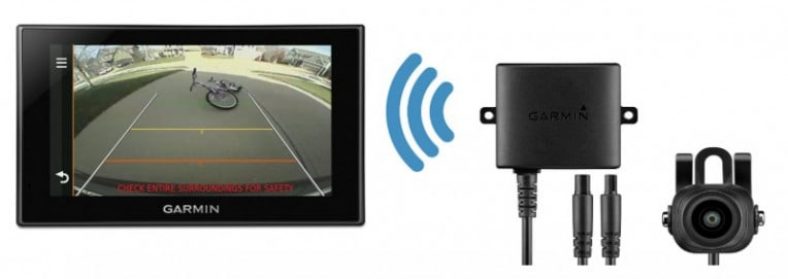
Since my last review, of the Garmin 67LM, there have been some follow-up queries. A couple of our readers asked whether the Garmin BC30 wireless backup camera was compatible with their devices. They also wanted to know if it was suitable for different types of vehicles.
For those of you who aren’t aware of what it is, the BC30 is a wireless camera that pairs with your Garmin Nuvi sat nav. It provides the driver with a view of what’s behind them. As you reverse (and depending upon your configuration), you get to see the rear via the screen of your sat nav. It’s a pretty neat idea to utilize the sat nav as a camera screen, but is it an easy add-on to your system?
As you can imagine, moving around with a large trailer can be a little precarious at times. Is the BC30 wireless camera suitable for a trailer? Is it something I can install myself? What devices is this compatible with?
Anthony Murphy
Well, Anthony, the short answer is yes, it is suitable for use with a trailer. It is also possible to install the camera yourself if you have a few tools and some patience!
Garmin does, however, recommend that these cameras are professionally installed as they will require hooking up to a power source. That being said they have rather usefully released a number of step by step videos showing how to install the Garmin BC 30 wireless backup camera yourself.
Before we get to the required steps for installation let’s look at which devices this camera is compatible with.
Is the Garmin BC30 Camera compatible with my sat nav?
Below is a list of compatible devices as provided by Garmin. If you don’t recognize some devices listed here, it’s probably because they are designed for truckers and larger vehicle drivers.
Garmin should be commended for providing device compatibility with both the entry-level and premium sat nav ranges. Many manufacturers would have left this accessory as an add – on to their flagship premium models only.
- Camper/RV 660
- dezl 570, dezl 770, dezlCam
- nuvi 55/56/57/58
- nuvi 60 series
- nuvi 2407/2408
- nuvi 2507/2508/2509
- nuvi 2609
- nuvi 2709
- nuviCam
This camera should remove those annoying and sometimes dangerous blindspots. Depending upon how you have installed the device you will see behind you when you reverse or you may be able to ‘switch’ on the camera manually at any time. To be able to change the sat-nav view from navigational mode to the rear camera you will need to be hooked up to a permanent power source not just your rear lights.
Remember, if your vehicle already has rear cameras installed then save yourself some money as you will most certainly not require this device!
Can I install the BC30 myself?
It most certainly is possible to install the BC30 yourself. Garmin has been rather kind to the budding DIY fans. They have released a series of step by step videos explaining how you go about installing the camera system.
What tools will I need?
From watching the video above it’s thankfully obvious that you won’t need too many tools. In fact, most of the tools will probably be found in your garage or the garden shed. Once again, Garmin stresses that you should seriously consider getting the professionals in for the job – probably because you may need to drill into the body of the car. In the video above they mount the camera onto the number plate which I’m presuming is an easier option.
If you decide to go ahead and install the backup camera yourself, you are going to need the following:

- Drill & drill bits
- No2 Philips screwdriver
- Wire connectors
- Tubing covers (waterproof)
- Multimeter (possibly required to check the circuit)
- Cable Ties
So once you have searched the shed and got all the tools required for the job, what’s next? You must now decide how and where you are going to place the camera. How are you going to wire up the system? Are you going to hook the device up to the far reversing light? Or are you going to use a permanent power supply from elsewhere?
If you install the camera to the reversing light, then the camera will only turn on when you reverse. As this is a transmitter, there will be a slight delay of a couple of seconds, before the camera switches onto the screen. If, on the other hand, you connect to a permanent power source, then you will have the ability to turn on the camera anytime via the sat-nav itself.
Before starting the project, it makes sense to put some proper thought into the installation process. The last thing you need is to drill into the body of the vehicle and find the camera is not in the best position! Crikey, I shudder to think of the consequences if I did that on the wife’s car!
At this stage, you should have decided on the location that you will be installing the camera. You should also have decided upon which power source you are going to hook into. How will the cables be outed from one end of the vehicle to the other? Try and find the best route and easiest route as mentioned in the videos.
It’s worth remembering that you could potentially attach some additional cameras to the system in the future. If you think that you might do so, then make sure that the cabling is easily accessible to the potential future camera locations. Once you have made these decisions, you are ready to begin the actual installation.
Continue Reading – Part 2 of The Installation


